Every time my two young daughters "clean" their room I cringe. I may or may not be on the obsessive compulsive disorder (OCD) spectrum, but I do believe everything I own has its place and should be put back in its "home" so it can be found when needed. My daughters? Not so much. Books are stacked like pancakes on their bookshelves, dolls and stuffed animals are piled high in the corner toy bin, and most everything else is placed on top of their dresser or bookshelf just so their bedroom floor is clean of debris. Inevitably, the next day, they are begging their mom or I to help them find the toy they desperately need.
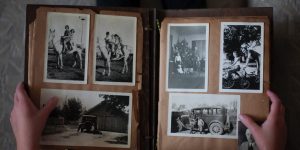
Unfortunately, my borderline OCD doesn't extend to my photograph collection. All my printed photos (pre-2012) are stored in a plastic bin underneath my bed, and I couldn't begin to tell you where the photos from my 1996 trip to Washington, D.C. are in that mess. If you are anything like me, I rarely take the time to browse my physical photographs, but I will flip through the thousands of photos I have stored on my phone, or in the cloud, on a whim.
What can we do to be better stewards of our physical photographs and our family's cherished memories? Have a scanning party! Groundworks has an Epson Perfection Photo Scanner that will help you preserve your printed photographs, photo slides, negatives and important documents. (Schedule a 1-1 appointment to learn how to use the scanners or reserve the equipment during our open hours.) Herrick District Library's Library of Things collection also has a photo/document scanner, slide/negative scanner, and other digital conversion equipment you can check out to use at home.
Here are a few steps to keep in mind as you start digitizing your photos at home or in Groundworks:
Step 1: Identify and Decide
Identify where your printed photographs, photo slides and negatives are located. Who knows, you may have forgotten about the old shoe box you placed in the basement rafters, or the pictures you lent to a family member. A potential bonus, a little searching and cleaning could lead to finding other lost treasures, or convince you to make a donation to your local thrift store.
Once you've located all your photographs it's decision time. Chances are not all of your printed photographs have meaning or are especially important to you. Scanning photos and negatives takes time, and you might want to consider limiting your selection to the most valuable. If there are multiple versions of an important photo, save and scan the one with the highest quality.
Step 2: Prepare the Scanner and Photos
Smudges, dust and hair will show up in your digital photos. Wipe the scanner's glass and lid with a lint free cloth dampened with water or a microfiber cloth you would use to clean your smartphone screen or eyeglasses.
Next, lightly wipe your photographs with a dry anti-static cloth. You can find these at many online retailers or your local camera store, and Groundworks will have these on hand for you to use. Anti-static cloth not only cleans your photograph, but it helps reduce static electricity on the photo and prevent it from attracting more dust particles and hair. Now you can place your photographs, slides or negatives face down on the scanner, but try not to touch the glass! You may smudge the glass and need to clean it again.
Step 3: Set Scan Properties - DPI and Bit Depth
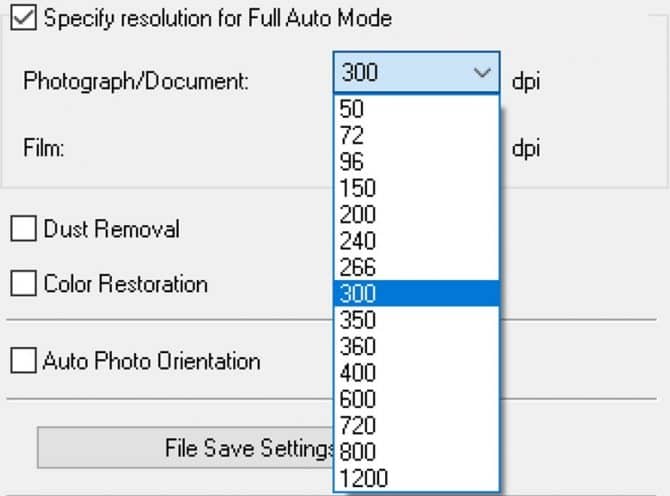
After you have prepared the scanner and photos, open the scanner software and set the photo scan properties. Two main settings determine image quality, dots per inch (DPI) and bit depth. DPI (similar to pixels per inch or PPI) measures how many pixels are crammed into a one-square inch space. For example, an image with 200 dpi potentially displays more details than the same image with 72 dpi. Here are the suggested dpi settings for different photo sizes and types:
- For most personal work, 300 to 400 dpi is enough for scanning 4"x6" photographs if you decide to reprint them at 4"x6" or 5"x7", but 600 dpi should be used for an 8"x10" print.
- Photographic slides contain a lot of detail in a small area and can capture more dpi, around 1400 to 1500 dpi.
- Photo negatives also hold a lot of detail, select a minimum of 1500 to 2000 dpi.
Remember that increasing the dpi increases the amount of data in the digital file, and the file size will also increase. It will also take longer to scan. If you only plan to look at your scanned photo slides and negatives on a digital device, 300 dpi will still give you a quality scan and will scan fairly quickly.
The Epson scanner software Groundworks will also allow you to adjust the bit depth of data per pixel. The more bits per pixel, the more information the pixel contains and the richer the digital palette. The most commonly used scan setting is 8-bits per pixel for grayscale (up to 16-bits), and 24-bits per pixel for color (up to 48-bits). If you wish to edit your photos after scanning you may want to consider maximizing bit depth, but remember that increasing bits per pixel increases the amount of data in the file and the file size.
For routine scanning where you do not plan to edit much, or where the quality of the outcome is not such a big deal, select 8-bit grayscale or 24-bit color.
Step 4: File Format
The scanner software will allow you to save your scanned photos or negatives as digital files in the most common file-type options, JPEG/JPG and TIFF. TIFF is the preferred format for digital photo preservation, and retains the maximum amount of digital data your scanner captures. If you have a choice, and the storage space, save your original master scan as a TIFF.
If you intend to modify or work with a digital photo, the Library of Congress (and Groundworks) encourages you to save two versions of it: a master version (TIFF) and a working copy (JPEG). Edit, modify and work with the JPEG. If you make a mistake you can't recover from, you can always make a new JPEG copy from the master TIFF file. The JPEG file will also be smaller and more convenient to email or post to social media.
Once you have selected the file type, and set your bit depth and DPI, you are ready to scan your photo. Preview the scan, if you have that option, and look it over to make sure you haven't picked up any dust or hair and check to make sure the photo is aligned properly. Scan away!
Step 5: Naming Your Files
Rather than settling for the file name the software automatically assigns your file (usually an alphanumeric name like "img001.jpg" or "DC2148793.jpg"), Groundworks highly recommends changing it to help you find the file later. To change the file name, right-click on the file (Windows), or control-click (Mac), and select "rename." Renaming the file does not affect its contents.
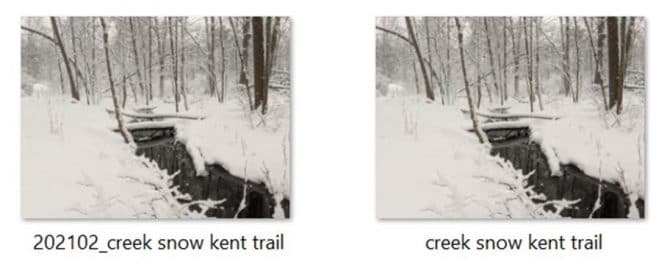
Many people include the date in the file name - at least the year or the combined year and month. If your file names lead with the year-month, followed by a descriptive word or two, your computer will sort the files in chronological order.
Step 6: Removing Photos From Scanner
Remove each photo from the scanner by slipping a piece of paper under it and lifting it. This helps you avoid touching the glass with your fingers so you do not need to clean the glass between each scan.
Next Steps
As soon as possible, back up your digital photos in a few separate places. Having one copy on your computer, another in the cloud and a third copy on a flash drive or external hard drive is ideal. We'll discuss how to organize and back up your digital photos (and other digital files) in greater detail in a future blog post.
Some content in this post was adapted from "Personal Digital Archiving: The Basics of Scanning" on the Library of Congress' blog, The Signal.


